When I first began my foray into the world of Bullet Journaling, I did what any sane person would do. I became obsessive about my new hobby and spent hours on Instagram ogling inspiration. This was my first introduction into the world of hand-lettering and brush lettering. As much as I admired the beautiful work I was seeing – I considered it out of my reach. These must be professionals, they must practice all day, they must spend a fortune on supplies, etc. But today I’m here to tell you, it’s not true!
Yes, of course, there are the professionals out there and practice does make perfect. But as I timidly began to give it a try, I realized it’s not nearly as hard as it seems. In fact, some of the most beautiful brush lettering is well within the reach of a beginner!
Today I’m going to guide you, step by step, thru some beautiful lettering projects. It’s fun, it’s easy, and you can do it! Let’s get started!
*This post contains affiliate links. You never pay more but I may receive a small commission that supports the running of this site and the free content you love!
Supplies You Need

First step: gather your supplies. Luckily this won’t be too hard since you only need a few things to get started and they are all relatively inexpensive.
You’ll need:
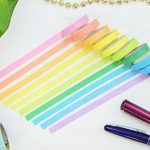
- Tombow Dual Tip Brush Pens – Any color set will do. These are super versatile, high quality and beginner friendly!
- Rhodia Dot Pad – You need high-quality paper in order to use the blending brush effectively. I recommend the Rhodia Dot Pad but you can also use any kind of Marker Paper.
- Blending Palette – The Tombow Blending Palette would be my first recommendation, and it is included in their Blending Kit. A blending palette must be plastic or coated, so if you don’t have the Tombow Blending Palette you can still use anything plastic you have on hand. Here I’m using a plastic paint palette from my kid’s stash.
Ombré Brush Lettering Technique #1
The first technique I’m going to show you is a half and half fade. This means that the color will fade from top to bottom across the entire word. This is an easy technique to master even for a beginner.
I begin with my quote in pencil. This is helpful if you’re a beginner, and want to give yourself a guide to follow. Once those long beautiful brush pens get into your hand, things can get a little shaky. The more you practice, the less this will be a problem.
I’ve chosen two colors. I start with the lighter one and only fill in my lines about halfway thru each letter. High-quality dot grid paper comes in handy here, as the dots give you a guide for exactly where to stop your pen stroke each time. This precision will give you a super cool dip-dyed look.
If your upward strokes feel a little shaky feel free to flip the pen over and use the fine tip on your upward strokes. Tombow Brush Pens are dual tipped after all! This is a great cheat for a beginner and yet another example of how versatile these pens are.
When you are done with your light color it will look something like this.
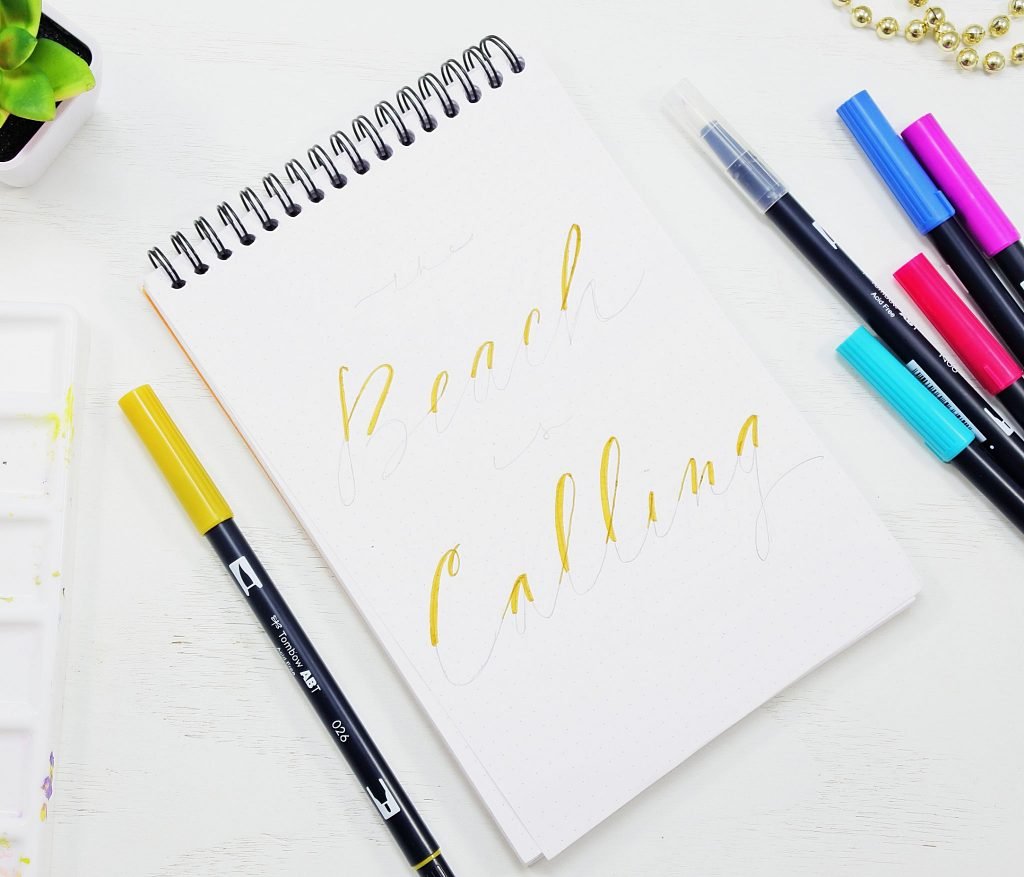
Now for your darker color. I chose a turquoise blue for my beach themed quote.
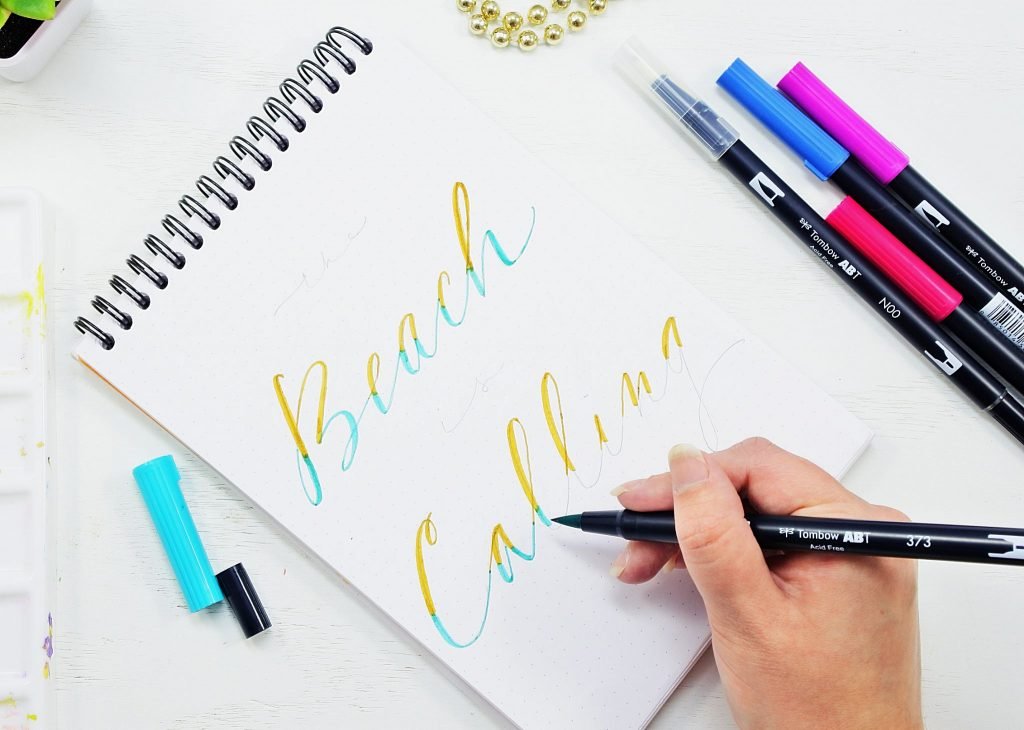
It’s okay if your colors overlap a little. The Tombow Blender Brush Pen will take care of that in a minute.
Continue filling in the bottom half of your letters. Dont forget – Thin up, Thick down! When your done with this step it will look something like this.
Now comes the Blender pen! This is what makes Tombow’s so much fun to work with. When you master the art of blending, there’s no end to the art you can create!
 Carefully and lightly feather the Blender brush tip from one color to another. You can blend up or down. What the blender will do is pick up a bit of the color you are touching, and move it between the colors. This perfectly blends together your two colors, and you won’t see a line between them.
Don’t forget you can use the fine tip end of your pen to blend the thin upward strokes. This will help you avoid and bleeding color around your fine lines.
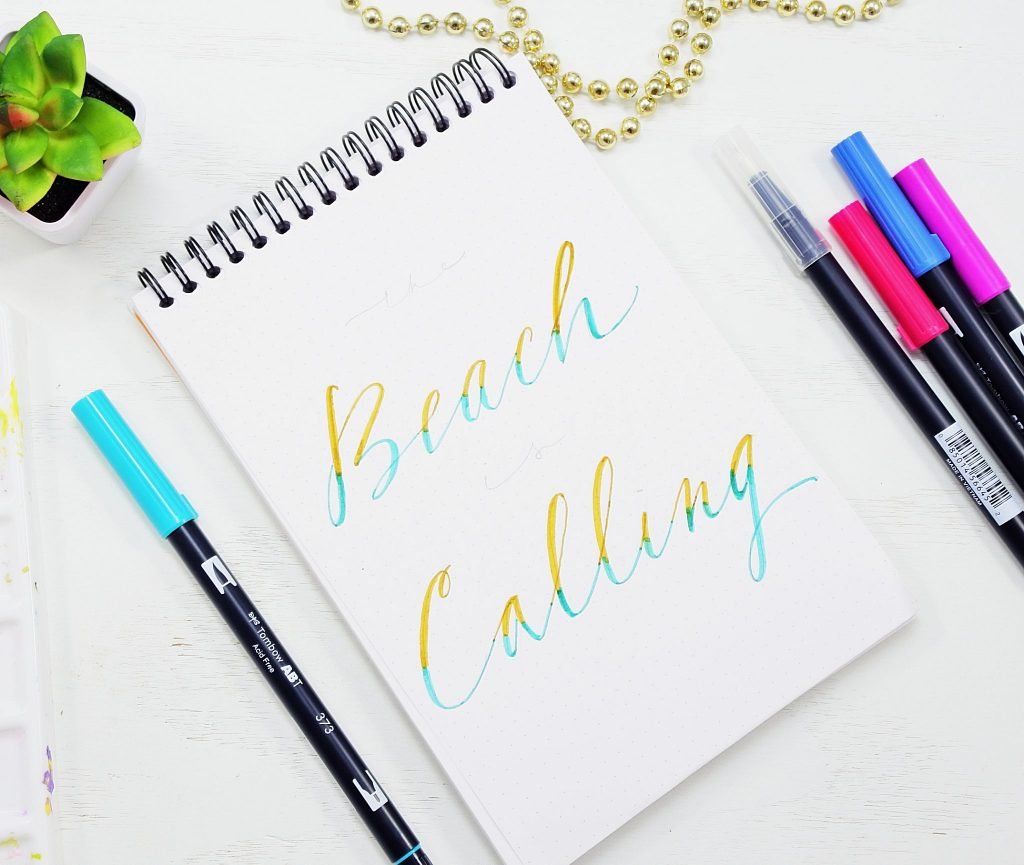
Once you are satisfied with your blend, your ombre hand lettered quote will look something like this.

Go ahead – Doll it up with some props and impress your Instagram followers. Bask in the adoration that follows – you deserve it.
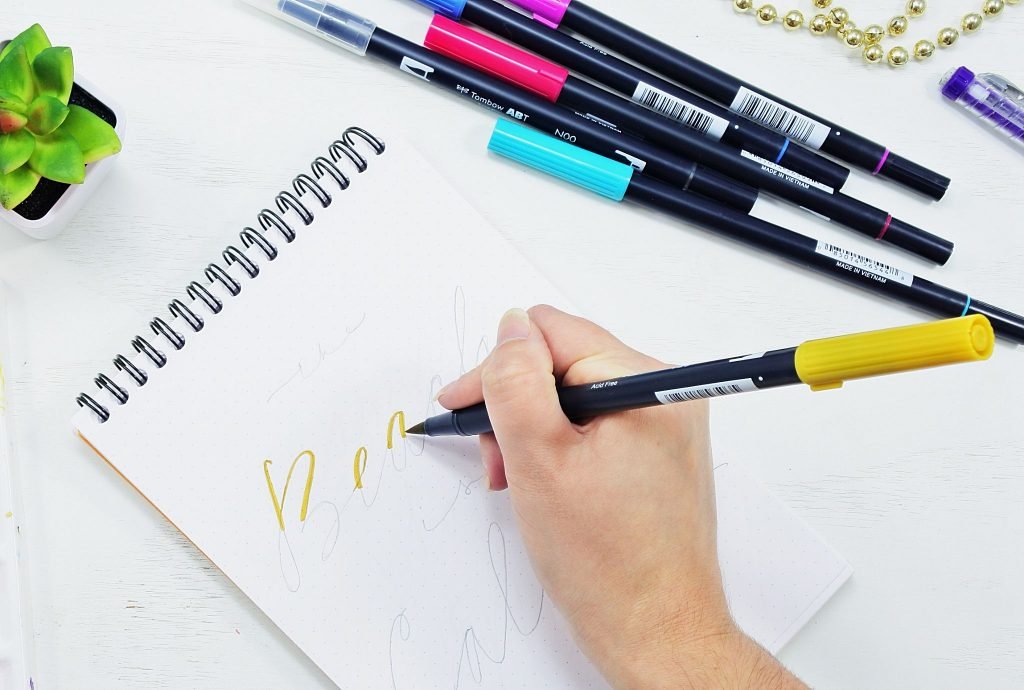
Ombré Brush Lettering Technique #2
In this second technique, I’ll show you how to smoothly blend from one color to another in a continuous script. This is when you’ll need that plastic palette.
First, gather your tools and pick your colors.
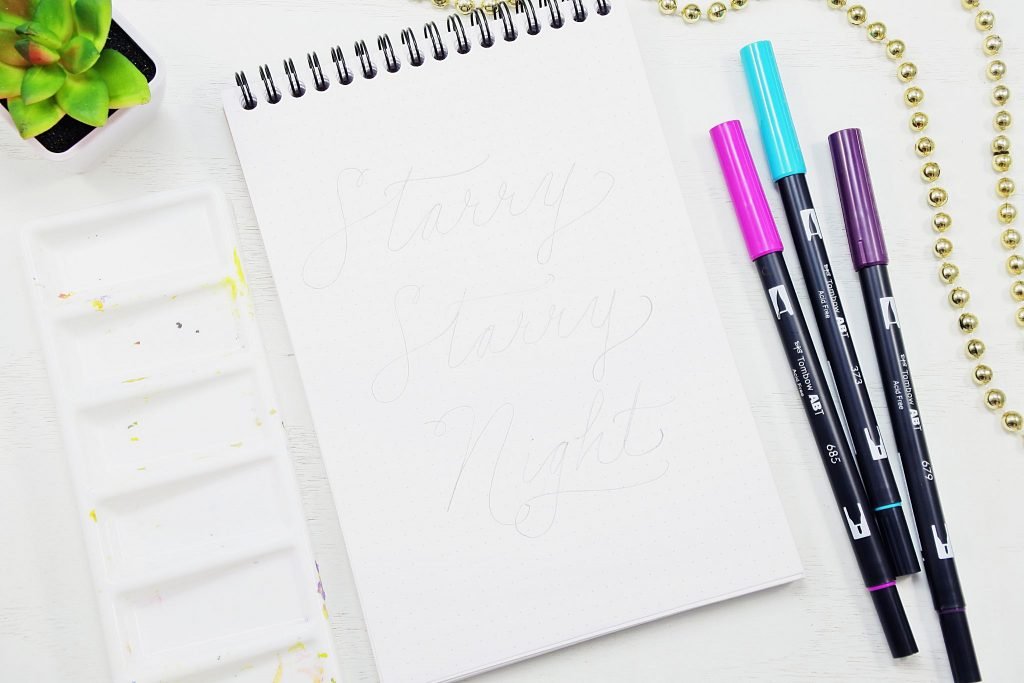
As you can see, I’ve already lightly penciled in my quote. This will give me a guide to follow as I switch from one color to another.
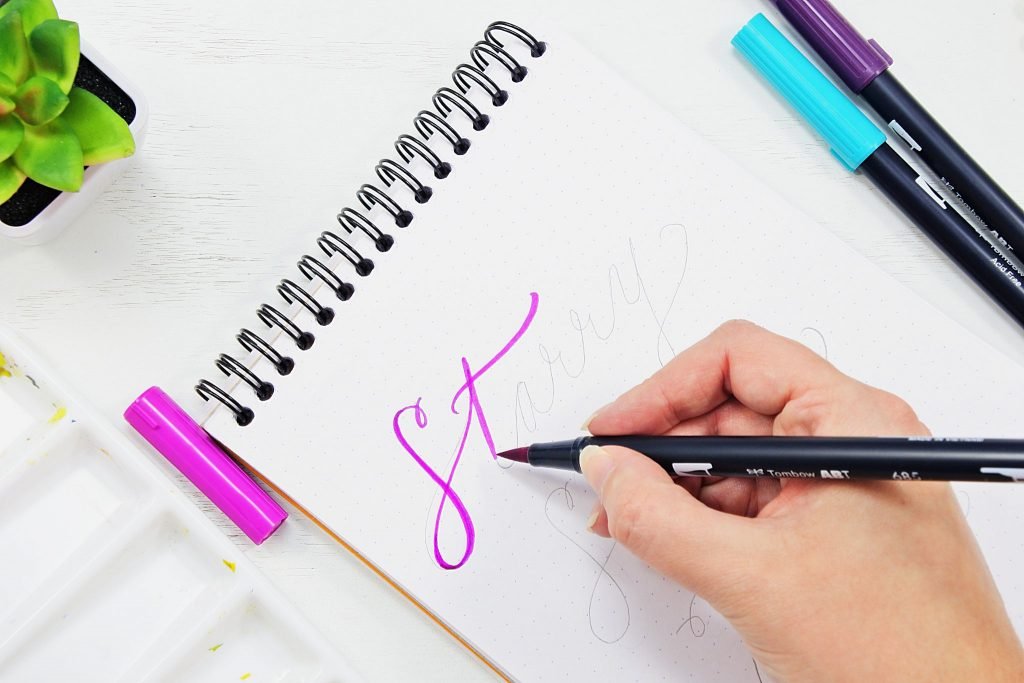
I’m starting with my brightest color, but you can start with whatever shade you like. I finish about one and a half letters before I move on to my next color.
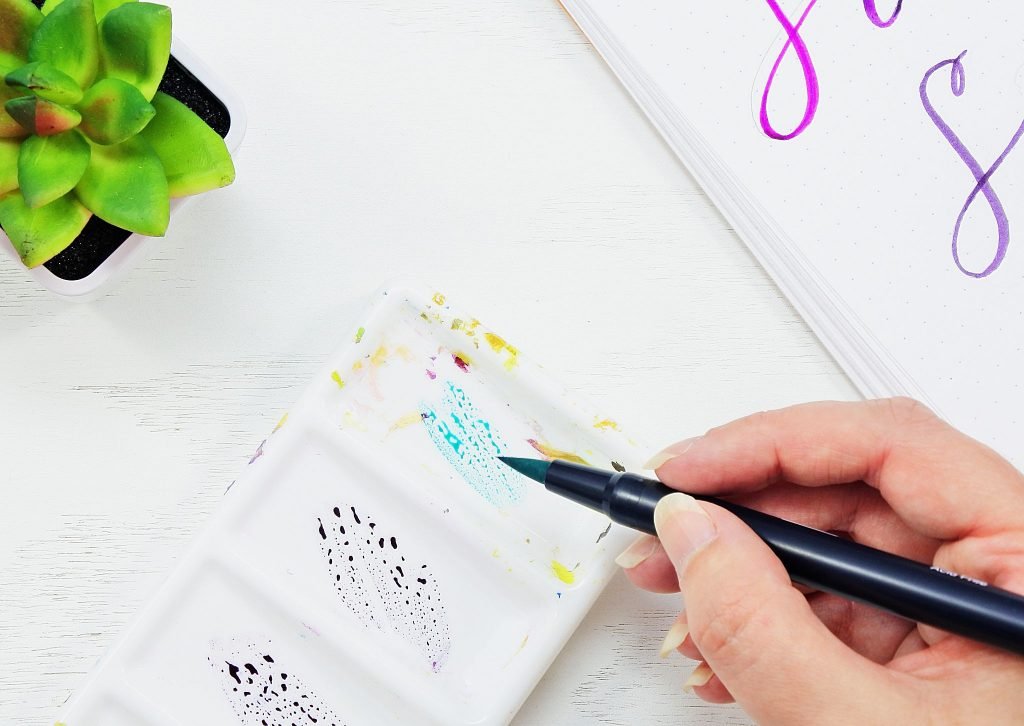
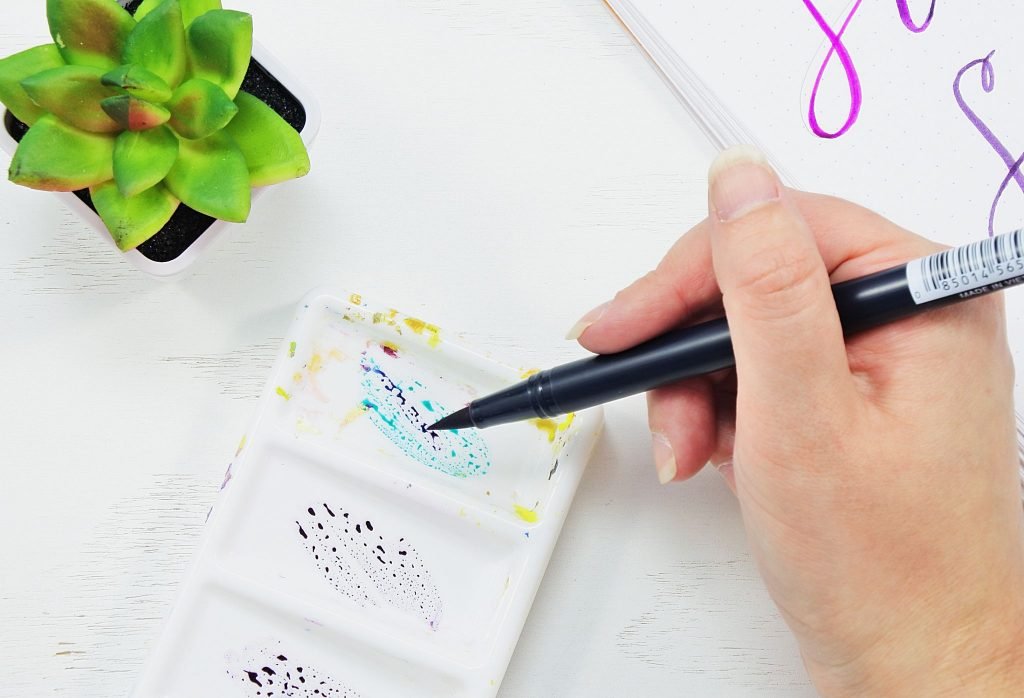
Now here’s the important part.
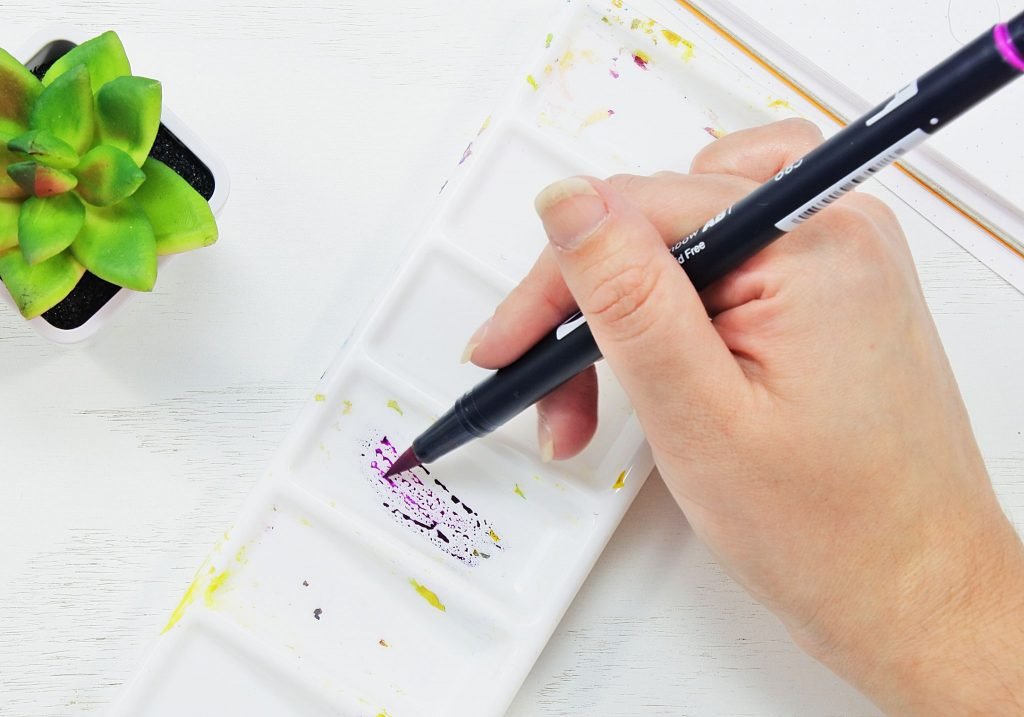
Take your next color, and swish it around lightly in your palette like you would a paint brush. Not too hard! Keep it light and gentle to avoid fraying. The color on your pen will build up in the palette and sit kind of like paint or watercolor. Next, you need to dip your first color (the one you started with) into that pool of color and swish it around. Your pen will pick up the color in the palette, just like a paint brush!
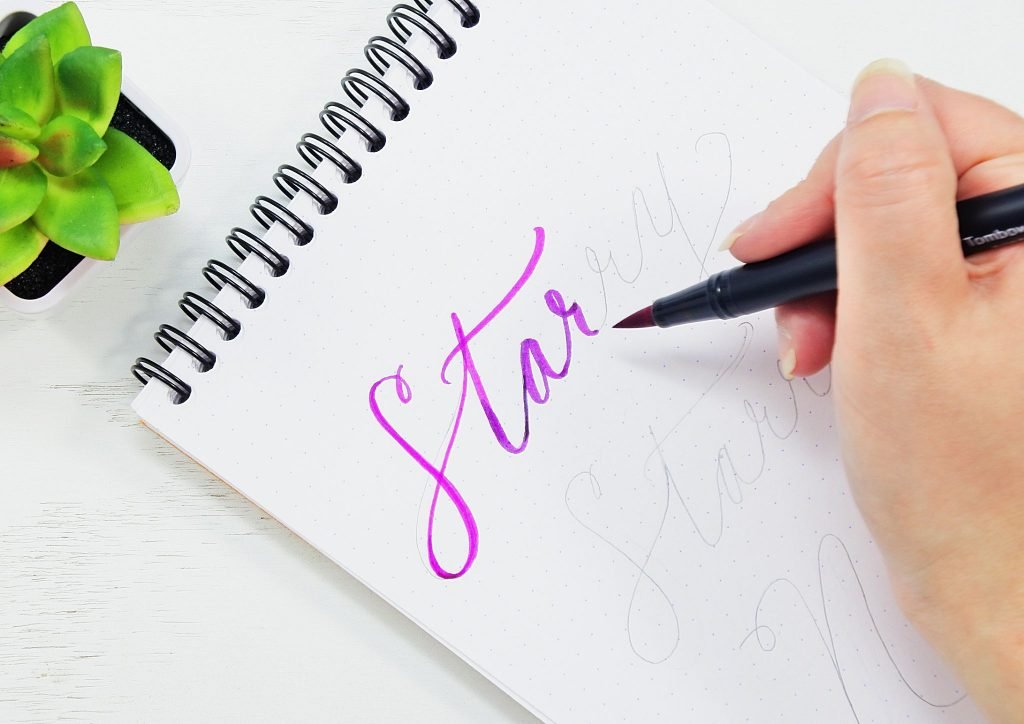
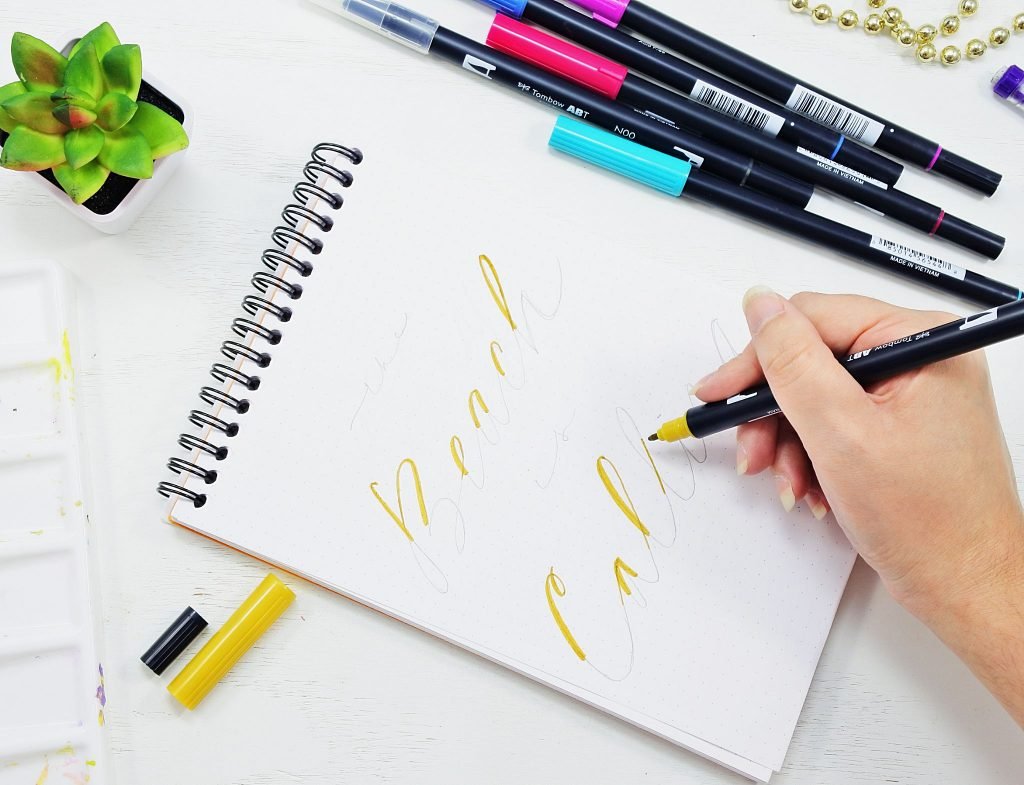
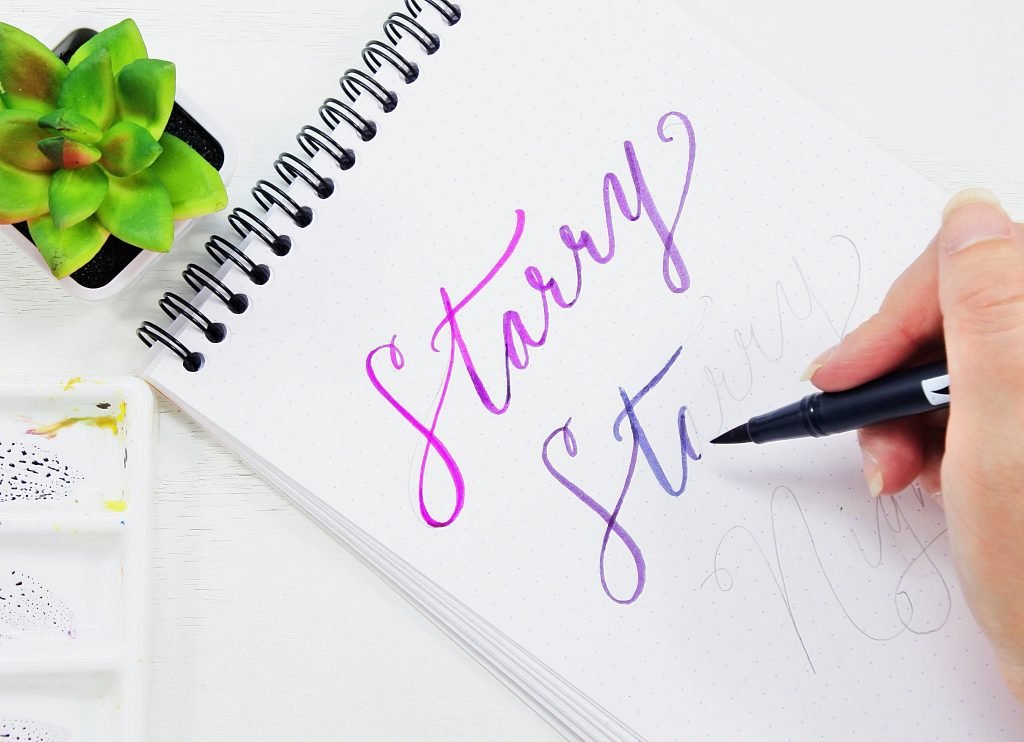
Here you see as I continue my lettering, My bright pink has now mixed with the dark purple and given me a seamless transition from on to the other. You can continue to dip your pen and pick up colors in your palette for a seamless blend.
I’m going to switch to my dark purple color to finish out the word. Then we can see the transition from bright pink to dark purple and everything in between. It’s a really pretty effect and so easy to do!
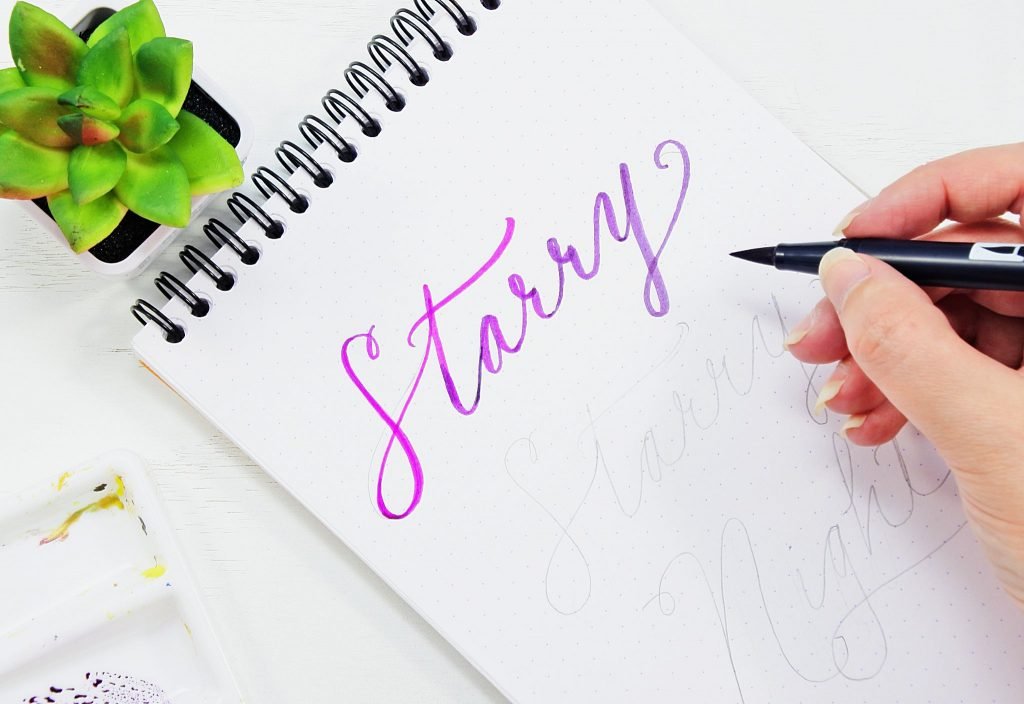
As I continue with my next word I begin to incorporate my third color. I start with the dark color I ended the last word on.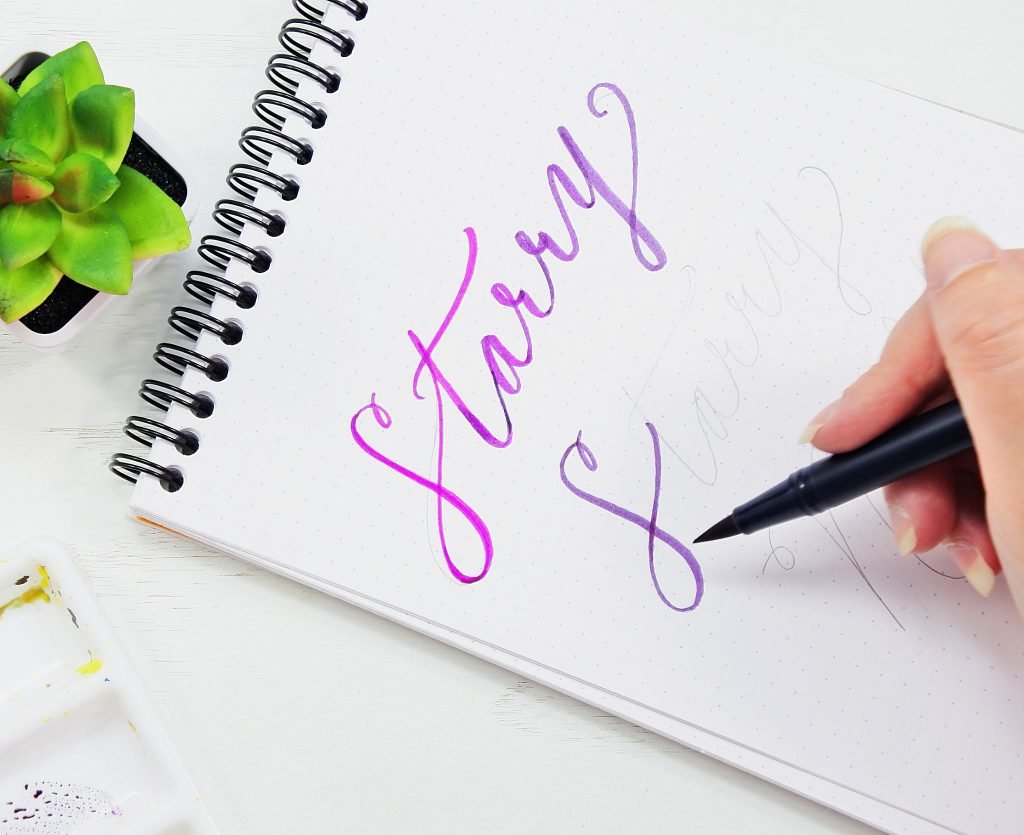
Now I follow the same steps from the beginning. Dab and swish your next color in the palette.
And pick up that color with your current color (for me this is still the dark purple).
And proceed…
Now we have a lovely mix of purple and blue! To finish this word out, I’m going to switch to my blue pen and dip it in purple color. That will ensure a smooth transition from purple at the beginning and blue on the end.

You may be wondering at this point, aren’t I ruining my brush pens mixing colors this way? NO! Here’s the amazing thing about Tombow Brush Pens. They are self-cleaning! As I continue to write with my pen, the color I picked up will fade and I will be left will my original color in all its glory!
If you continue to follow these steps till you’ve completed all your words, you will probably be left with something like this.

So pretty and so easy to do! Give it a try! I promise once you get started with brush lettering, you won’t want to stop!
Want more sweet tips to improve your lettering? Check out How to Hand Letter LIke a Rockstar: Tips and tricks for beginners!